Saturday, October 30, 2010

Find your polling place and follow the US Election on the go

The United States midterm election is on Tuesday, November 2, and we encourage all eligible US citizens to get out and vote. We’ve made it easy to find your polling place and follow election news by visiting our Election Center mobile site at m.google.com/elections on your Android-powered phone or iPhone.


Enter the address where you’re registered to vote, and we’ll show you a Google Map of your polling place. The Election Center site also has information about candidates running for office in your area.


So come Tuesday, let your mobile phone guide you to your polling place, and let sanity guide your vote!

Friday, October 29, 2010

New in Google Maps for Android: Updated reviews, search filters, and Latitude real-time updating

Lately, we’ve been working on giving you even better ways to find nearby places with Google Maps for Android, such as the Places icon and rich Place pages. Today, we are launching Google Maps 4.6 with a new design for Place page reviews, more options to filter search results, and a Google Latitude real-time updating option.

Place page reviews
Now, you’ll see that Place pages on Android Maps share the same new design for displaying reviews as used by Place pages on your computer. You can see:
  • “Reviews from around the web” for highlighting sites that have high-quality reviews about the place.
  • “Reviews from Google users” for reviews posted directly to Google Maps by other users
Filter search results
Of course, you’ll first need to narrow down which Place page reviews to check out. In addition to distance and ratings, you can also filter results for some searches by:
  • Open now
  • Neighborhood
  • Related searches

Find the right place with the updated reviews section (left) or search results filters (right).

Google Latitude real-time updating
In Latitude, you can also choose an experimental “Real-time updating” option from an individual Latitude friend’s profile page to help meet up with them by temporarily seeing faster location updates (friends must have Maps 4.6 and Android 2.2+).

Get Google Maps 4.6 for Android 1.6 and above everywhere Maps is already available. Just search for Google Maps in Android Market (or tap here from your phone).

Visit our Help Center to learn more or tell us your feedback and questions in our Help Forum.

Thursday, October 28, 2010

Bring Your Phone to Work Day: Managing Android Devices With Google Apps

(Cross-posted and excerpted from the Official Google Enterprise Blog)

With over 200,000 devices activated each day, Android is seeing rapid adoption, and today we are launching new administrative controls that make it possible to securely manage these devices in the Google Apps environment. With this launch, Google Apps provides a comprehensive mobility solution for all major mobile platforms. You can manage most mobile devices right from the browser, without having to deploy dedicated servers.

Many Android devices feature tight integration with Google Apps, including native applications for Gmail, Google Talk, and Google Calendar, as well as mobile access to Google Docs. Now any employee with an Android device running version 2.2 - personal or company-issued - can access their corporate information while allowing administrators to enforce data security policies such as:
  • Remotely wipe all data from lost or stolen mobile devices
  • Lock idle devices after a period of inactivity
  • Require a device password on each phone
  • Set minimum lengths for more secure passwords
  • Require passwords to include letters and numbers
When the employee leaves the company, the administrator can withdraw access to corporate info, which allows the employee to continue to use their device if it’s their own

These policies can be enforced on devices that have installed the Google Apps Device Policy application, which will be available from Android Market in the next few days. They will be available free to all Google Apps Premier and Education Edition customers in the next few days, and can be accessed from the 'Mobile' tab under 'Service Settings' in the Google Apps control panel.

To learn more about these updates in mobile device management for Google Apps, join us for a live webcast with Mayur Kamat, Google Apps Product Manager, on November 10, 2010 at 9 a.m. PDT / 12 p.m. EDT / 6 p.m. GMT. Register now

How to install CAB files on Your Pocket PC

I am writing this simple guide with the idea to help you installing and using all those great applications you will ever want. How to install CAB files on Pocket PC?

First of all you need to find and download the program you want to install. I will use an application called PDAStatus, which shows the status of your device on today screen. When the download process is complete you need to copy the CAB file and paste it somewhere on your device, I personally recommend to do this at the Storage Card. Note that some applications are zipped so you need to unarchive them to have the CAB file. Now you need to open pocket pc's File Explorer, located into the Programs. Browse the storage card or the location you used to copy the CAB. When you select and run it, a windows will appear, which asks you to Choose a location to install the program. It can be your Device or the Storage Card, so select your choice and click below on Install. The process after that is fully automated and after the installation is complete it will show you confirmation screen.

This is all you need to do to install CAB files to your Windows Mobile Pocket PC device. Below is video on which you can see how I installed PDAStatus on my HTC TyTN.

Gmail in mobile Safari: now even more like a native app

Go to gmail.com from your iPhone and you’ll notice two improvements we’ve rolled out over the past few weeks. First, scrolling is snappier: the speed of scrolling reflects the speed of your swipe gesture. This is helpful for long conversations where a few quick flicks will get you to the information you need much faster than before. Second, the toolbars stay on screen while you’re scrolling rather than moving down into view after each scroll. Being able to access your toolbars from any point on the page should make it easier to triage your email and move around the app.


If you use Gmail in your mobile browser a lot, you may have noticed that we recently tried several different variations of these buttons. We‘ve iterated on the design and made improvements based on your feedback. If you have more suggestions, please post them in our forum, or if you use Twitter, mention #gmailmobile and we'll take a look. If you’re a developer and are interested in learning about the Javascript and HTML techniques we used to do this, we’ll post an article to code.google.com/mobile in the coming weeks.

You can see these improvements by visiting gmail.com from the browser of iPhone and iPod touch devices running iOS4 (English-only for now). And if you like Gmail in mobile Safari, make getting to it easier by tapping the “+” at the bottom of the screen and then “Add to Home Screen.” (Don’t see the new changes yet? Try clearing your cache and refreshing the page.)

Update, 12/8/10 9:10am PST: We promised you a code article. Here it is!

Friday, October 22, 2010

STC Qitaf Codes for Prepaid Lines SAWA and LANA

STC Qitaf reward program is a free program for STC customers. You can find a detailed introduction of Qitaf here.

In this post I'll only describe short codes for Qitaf that might be useful for Qitaf users.


SMS the desired code to 902

  • To Register in Qitaf 201
  • To Get Qitaf Balance 202
  • To Exchange 100 Qitaf Points for 35 SR Extra Credit 203
  • To Exchange 100 Qitaf Pointss for 140 Local SMS 204
  • To Exchange 100 Qitaf Points for 80 International SMS 205
  • To Exchange 100 Qitaf Points for 60 Local MMS 206


Voice Search in Russian, Polish, Czech and Turkish

Over the past few weeks we have launched Voice Search in four new languages: Russian, Polish, Czech and Turkish. Try speaking queries like “концерты Юлии Савичевой” (tour dates for Yulia Savicheva), “przepis na pierogi” (recipes for pierogi), “obrázky Hradčan” (pictures of the Prague castle), or “istanbul hava durumu” (weather in Istanbul). Note that you can only speak one language into the app at any time and that you’ll need to change your language setting first.


Voice Search is often preloaded on new Android devices. In that case, all you have to do is press and hold the search button and then speak your query. If you have an Android (2.0 or higher) phone but don’t have Voice Search installed, download the “Voice Search” app from Android Market. If you own an iPhone or other smartphone, you can download Google Mobile App with Voice Search from m.google.com


Tuesday, October 12, 2010

How to Decrease a lengthy Home Page of your Blog in Wordpress

You can truncate blog entries so that only the first part of certain posts is displayed on the home and archive views. When you do this, a link will be placed directly after your excerpt, pointing the reader to the full content of the article.

You can find the More Tag button in the first row of the visual editor toolbar or by pressing Alt+Shift+T:


Using the More tag

1) Go to Posts -Add New in your dashboard to create a new blog entry (this does not work with Pages).

2) Begin writing your post. When you decide that you want to cut it off, insert the More tag to split the post (mark where the excerpt officially ends). You will see the More Tag as such in the visual editor:


3) Finish writing your post.


4) Publish the post and view the front page of your blog. You should see your post effectively split using the More Tag. Click on the link, and you will be taken to the post in its full form. The front page of your blog should display the post similar to:


But wait, there’s more!

You can further customize the message that displays in the link to the full post content.

You will need to do this in the HTML view of your editor. Once you have changed to the HTML editor, look for this code: (remove spaces)


< ! - - more - - >

Custom Read More Message

To customize the message, simply add a space after

< ! - - more But wait, there's more - - >

The front page of your blog should now display your post as such:


Note: You will need to customize the message for each post. You cannot declare a global message that will take effect on each post of your blog that uses the More Tag.

Formatting Issues

If the More Tag is inserted after writing a post, formatting errors can occur. The issue occurs when you insert the More Tag using the visual editor, but it is actually placed within another HTML tag. As an example:

< strong > Oh man, this post is messed up.< ! - - more - - > < / strong >

The above will cause the rest of the posts on your front page (or in an archive) to be formatted as bold, sometimes including your sidebar contents. Not cool. It can also make the sidebar fall to the bottom of the page. To fix the issue, just place the More Tag on the outside of any pesky closing HTML tags, like so:

< strong > Oh man, this post is messed up. < / strong > < ! - - more - - >

Make sure to go into the HTML view of the problematic post and move your More Tag to outside of any HTML tags (this includes div, strong, em, etc…).

Check these video tutorials


Thursday, October 7, 2010

HtC Smart Review and How to's

Being a veteran in the smartphone market is huge advantage when you decide to come up with something new. After so many Windows Mobile and Android devices, HTC surprised us with a completely different product – HTC Smart. It’s a semi-smartphone that runs on the unusual Brew Mobile platform strengthened with the fancy Sense UI.

Throwing another mobile OS on the market is hardly the right move since the smartphone arena is already over-crowded. But it seems HTC Smart is HTC’s way of making a feature phone. The Linux-based Brew Mobile platform used for the HTC Smart hardly makes it a proper smartphone to boot. Truth is, there are modern touch feature phones that have more “smart” in them than this one.
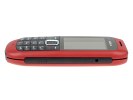
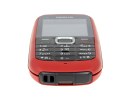
But enough about software, let’s see what HTC Smart has to offer in terms of hardware.

Key features

  • Quad-band GSM/GPRS/EDGE support
  • 3G with HSDPA 3.6 Mbps
  • Brew Mobile software platform with HTC Sense UI and social networking integration
  • 2.8" resistive touchscreen of QVGA resolution
  • 300 MHz processor, 256 MB RAM, 256 MB ROM
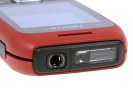
  • 3.15 megapixel fixed-focus camera with LED flash
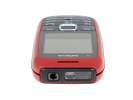
  • Standard miniUSB port for charging and Mass Storage data transfers
  • Stereo Bluetooth (A2DP)
  • microSD card slot, up to 16GB support
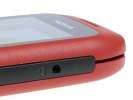
  • Standard 3.5mm audio jack
  • Smart dialing
  • Stereo FM radio with RDS
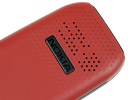
  • Excellent loudspeaker performance

Main disadvantages

  • No Wi-Fi connectivity
  • QVGA resolution doesn’t do Sense UI graphics justice
  • Screen has poor sunlight legibility
  • No video-call camera
  • No voice dialing
  • Camera lacks auto focus, records QVGA@15fps video only
  • Only few applications preinstalled and no access to app repository for native BREW apps
  • Limited organizer functions – no notes/memo, no voice recorder or an office document-viewer
  • No multi-tasking
  • Web browser poor and rather slow

Q.What OS does the phone support?
Using HTC Sync for HTC Smart this phone supports Windows XP, Windows 32-bit or 64-bit Vista, and 32-bit or 64-bit Windows 7.


1. Please go to to the support section of our website to download HTC Sync for HTC Smart, and install it to your computer.
2. Connect your phone to your computer. The Synchronization Setup Wizard automatically starts and guides you to create a sync partnership. Click Next to proceed.
3. You can choose to sync your contacts only or calendar only with Outlook Express or Outlook by checking the Synchronize contacts with or Synchronize calendar with check boxes and then choose Outlook Express or Outlook.

Q.How do I transfer files between the phone and my computer via Bluetooth?
To transfer files using Bluetooth, you must pair your device with the computer first. To pair the devices, open the All Programs screen and tap Settings > Wireless controls > turn on Bluetooth. If the device list is empty, it prompts you to scan now. Tap Yes to scan for Bluetooth-enabled PCs within range. After it has found your PC, select the name of your PC displayed in the device list, and then tap the name. Your phone then automatically tries to pair with your PC.

Once the device is paired with the computer, you can send pictures and videos. To do this, from the HOME screen, slide to the Albums screen, and then tap the screen to display albums. Select an album and open a photo or video that you want to share. Press the MENU button and then tap Share > Bluetooth. Your phone starts scanning for your Bluetooth-enabled PC. Select the name of your PC from the device list and the photo or video is sent.

To send music files, open the All Programs screen and tap File browser > Phone storage and then select the folder where you stored your music files. Press the MENU button and tap More > Send > By Bluetooth > select the music file > Done. The phone starts scanning and after it has found your PC, select the PC name and the music file is sent.


To send a contact, from the HOME screen, please slide to the People screen. Press the MENU button, and then tap All > All People > select a contact > press the MENU button > Send contact > Bluetooth. The phone starts scanning and after it has found your PC, select the PC name and the contact details or business card is sent.

To send a calendar event, open the All Programs screen and tap Calendar. Press the MENU button and then tap Agenda > select the event you want to share > press the MENU button > tap Send > Send via Bluetooth. The phone starts scanning and after it has found your PC, select the PC name and the music file is sent.

NOTE 1: To open the All Programs screen, please see the FAQ "How do I open the All Programs screen?"
NOTE 2: If Settings is not on the first page of the All Programs screen, slide through the screens to view other applications. To view other applications, please see the FAQ "How can I view other applications on the All Programs screen?"
NOTE 3: To slide to the People screen, please see the FAQ "How do I view the extended HOME screens?"

Q.How can I improve my phone’s performance when it is acting slow, sluggish or is not responding as fast as it used to?
To improve your phone's performance, open the All Programs screen and tap Internet. You will be brought to the home page. From within the browser, press the MENU button and then tap More > Settings > Privacy setting > Clear History. Tap Ok if you are asked to surely delete it all.

NOTE 1: To open the All Programs screen, please see the FAQ "How do I open the All Programs screen?"
NOTE 2: If Internet is not on the first page of the All Programs screen, slide through the screens to view other applications. To view other applications, please see the FAQ "How can I view other applications on the All Programs screen?"


Q. How do I open the All Programs screen?
On the HOME screen, press the BACK/HOME button to open the All Programs screen. Here, all functions or applications are displayed in grid view. To open an application, tap on an application to select and open it.

Q. How many SMS/MMS messages can I store on my phone?
You phone can store up to 5000 messages.

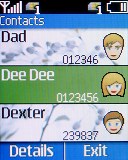
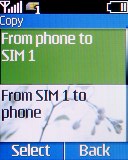
Q. How can I import contacts from my SIM card?
From the HOME menu, please slide to the People application. Press the MENU button and then tap All to open the People window. Press the MENU button and then select SIM manager > press the MENU button > SIM to device. You can import one or more, or all contacts by tapping a contact to select it. Press OK when you are done.

NOTE 1: To slide to the People screen, please see the FAQ "How do I view the extended HOME screens?"

Q. How do I reset and restore my phone back to the factory default settings?
Warning: Resetting your phone will erase your phone completely. Remember to back up your phone information and settings.

There are two ways to reset your phone:
1. Open the All Programs screen and tap Settings > Security > Factory reset. Enter "1234" to confirm that you really want to reset your phone.
2.To reset your phone while it is turned off, press and hold the VOLUME UP/VOLUME DOWN and END CALL/POWER buttons. Press the VOLUME DOWN button to perform the factory reset .

NOTE 1: Make sure to back up important data you have on the phone before you reset your phone. Please see the FAQ "How do I backup my phone?"
NOTE 2: To open the All Programs screen, please see the FAQ "How do I open the All Programs screen?"
NOTE 3: If Settings is not on the first page of the All Programs screen, slide through the screens to view other applications. To view other applications, please see the FAQ "How can I view other applications on the All Programs screen?"

Q. How do I log in and out of Facebook?
To login, open the All Programs screen and tap Settings > Data services > Facebook > Facebook. Enter your username and password and then tap Login.
To logout, from the HOME screen, tap Settings > Data services > Facebook > Facebook. When prompted, tap Yes.

NOTE 1: To open the All Programs screen, please see the FAQ "How do I open the All Programs screen?"
NOTE 2: If Internet is not on the first page of the All Programs screen, slide through the screens to view other applications. To view other applications, please see the FAQ "How can I view other applications on the All Programs screen?"
NOTE 3: An internet connection (GPRS/3G, etc.) is required to access this service. Your operator may charge for using GPRS/3G.

Q. How do I protect my phone from unauthorized use?
You can protect your phone from unauthorized used by assigning and enabling a phone lock code. To enable a phone lock code, open the All Programs screen and tap Settings > Security > Phone lock code. When prompted, enter and confirm the passcode and then tap done.

NOTE 1: To open the All Programs screen, please see the FAQ "How do I open the All Programs screen?"
NOTE 2: If Settings is not on the first page of the All Programs screen, slide through the screens to view other applications. To view other applications, please see the FAQ "How can I view other applications on the All Programs screen?"

Q. How many contacts can I sync from my MS Outlook using HTC Sync for HTC Smart?
Your phone can sync up to 2000 contacts using HTC Sync for HTC Smart. If you have over 1000 contacts, however, it may take a little longer to load all your contacts, and therefore smart dialing will only function properly a minute or two after booting up.

Download Full User guide here
http://member.america.htc.com/download/web_materials/QSG/HTC_Smart/20100311_Smart_HTC_English_QSG.pdf

An easier way to use Google Latitude on your computer

We’re happy to introduce an easier way to use Google Latitude from your computer at google.com/latitude. You can now see where your friends are, start using Latitude apps, and share your location all from one place when you’re at your computer.

Find your friends
We launched Latitude with a desktop iGoogle gadget to help you stay in touch with friends and family that may not have a smartphone. We’ve since learned that a desktop experience is important to you even if you’re already using Latitude on your phone. Today, you can now visit a dedicated site that makes it easier than ever to use Latitude when you’re already on your computer. From the Friends tab, you can:
  • See where your friends are on Google Maps
  • Add friends and accept sharing requests
  • Control your privacy settings


Do more with Latitude
You’ll also now find Latitude and Latitude apps together in one place. After browsing your friends list, go to the History or Apps tabs to turn on optional Latitude apps such as:


Share your location
Just like on your phone, you can choose to share your location with friends and family from your WiFi-enabled computer. Before you can share your location, you’ll need to first give Latitude permission to access your location when prompted by your supported browser. You can always change your browser or Latitude privacy settings later. Learn more in the Help Center.

To get started, go to google.com/latitude on your computer. If you’re new to Latitude, you can then start on your phone by sending yourself a text message or choose to start on your computer.

Wednesday, October 6, 2010

Nokia's Dual Sim Mobile C1-00

Just shared from GSMArena.com

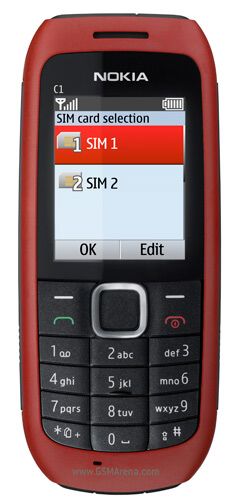
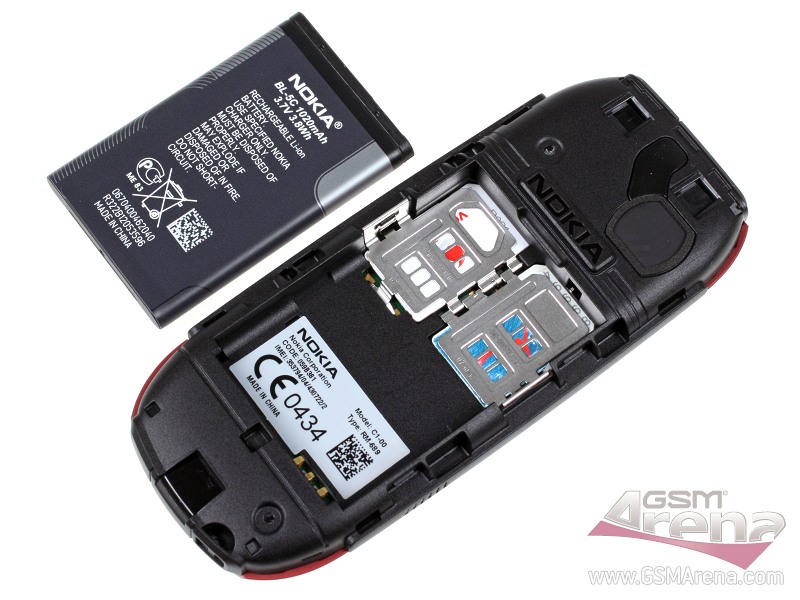
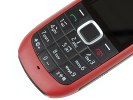
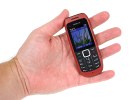
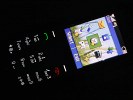
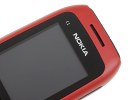
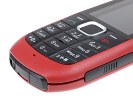
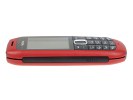
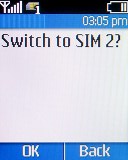
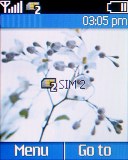
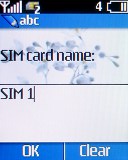
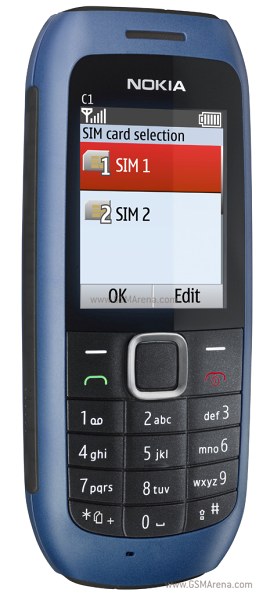
After years of watching their rivals introduce one dual SIM phone after another, a few months back Nokia finally decided to join them and unveiled its first mobile phones capable of accommodating two SIM cards at the same time. Eager to see what it held in store, we took one of them, the Nokia C1-00, for a spin around our testing grounds.

Instead of even bothering to catch up with the competition, the Finns chose to play the game by their own rules and made their first steps into the dual SIM mobile phone market by announcing a couple of entry level devices. No luster and certainly nothing groundbreaking, these devices (including the C1-00) pack only the most basic of features.
So, you get what you pay for. And what you need. Which is dual SIM telephony. The Nokia C1-00 works with two SIM cards and comes with a color display, a built-in FM radio and a handy flashlight.
Here’s the pros and cons of getting a Nokia C1-00.


Key features:

  • Entry level dual SIM feature phone
  • Dual-band GSM support (GSM 900/1800 MHz), no dual standby
  • 1.8" 65K-color display of 128-by-160-pixel resolution
  • FM radio
  • Flashlight
  • Low price
  • Promising 1020mAh battery

Main disadvantages:

  • Only one SIM card is active at a time
  • Keypad not comfy enough
  • No memory card slot
  • No support for GPRS, EDGE or Bluetooth
As the short specs sheet reveals, there is no camera on the C1-00 back, and there is no need to look for a memory card slot either – you won’t find any. However, it would’ve been more surprising to actually see those on a 30-euro mobile phone. Long story short, the Nokia C1-00 feature pack is actually just fine.
What isn’t, though, is the phone’s dual SIM functionality. While this still is a dual SIM capable device, there is no dual standby on board. In other words, only one of the two inserted SIM cards is active at a time while the inactive one is unreachable.

Despite that, the Nokia C1-00 is still quite useful. You don’t need to turn off the phone each time you want to toggle the active SIM card, and let’s not forget that the C1-00 is among the most affordable phones out there.
Let’s see what else is under the Nokia C1-00 hood. Join us on the next page to take a look at the phone’s design and construction.

Nokia C1-00 unboxed

The Nokia C1-00 comes in a plain cardboard box. Other than the phone itself, you’ll get the typical basic accessories: a charger and the good old one-piece handsfree that ends in a 3.5mm audio jack. It comes in handy when making phone calls while driving or when using the FM radio (the phone lacks a built-in antenna). There’s, of course, a manual too.
Nokia C1-00 Nokia C1-00
The Nokia C1-00 retail package

Nokia C1-00 360-degree spin

The Nokia C1-00 isn’t exactly the most compact of basic feature phones at 107.1 x 45 x 15 mm but it would still fit in most pockets or purses.
The C1-00 tips the scales at 72.9 grams, which is perfectly acceptable. The thing is made of plastic that looks and feels cheap, but that’s to be expected from such an inexpensive device.
Nevertheless, the Nokia C1-00 feels robust enough and handles with ease.

Design and construction

The Nokia C1-00 comes in many flavors – Medium Blue, Light Gray, Sea Green, and Red (like the one paying us a short visit). We can hardly call the C1-00 design attractive but the phone is still nice looking (especially some of its color variants).
Both the front and the back of the phone are made of matt fingerprint-proof plastic which may not look expensive but it sure does the job.
Nokia C1-00 Nokia C1-00 Nokia C1-00 Nokia C1-00
The Nokia C1-00 isn’t an eye-catcher but does the job
Half of the C1-00 front is taken up by the 65K-color TFT display. It measures 1.8 inches and is of 128 x 160 pixel resolution. The image quality is surprisingly good for this price range and so is sunlight legibility. Right above the display we find the centrally located earpiece.
Nokia C1-00 Nokia C1-00 Nokia C1-00
The C1-00 display is fine • Earpiece
Underneath the screen is the navigation deck built around a D-pad with no center button in it (confirmation is now made using the left soft key).
While the four buttons surrounding the D-pad are very comfortable and feature a nice tactile feedback, the D-pad is kind of hard to press but in time you get used to it.
Except for navigation, the D-pad is also used to quickly turn on and off the inbuilt flashlight. Pressing twice up starts the flashlight and to switch it off, just press the D-pad once again in the same direction.
As for the numberpad underneath, all keys feature great tactile feedback and even if there is no space between them, they are still very user-friendly. Their only downside is the annoying click sound produced each time you press a button.
If you want to switch from one active SIM card to another, press and hold the asterisk key, while the phone is in standby mode.
Nokia C1-00 Nokia C1-00
Buttons are comfy enough • mic hole
The left side of the handset is bare while the right one only hosts the 2mm charger plug.
Nokia C1-00 Nokia C1-00 Nokia C1-00
The bare left-hand side • the 2mm charger plug is on the right
On the Nokia C1-00 top we find the flashlight we mentioned a second ago as well as the standard 3.5mm audio jack right next to it. The phone can’t be used as a portable music player but there is at least an FM radio on board.
Nokia C1-00 Nokia C1-00 Nokia C1-00 Nokia C1-00
Flashlight and 3.5mm audio jack on the top • lanyard eyelet on the bottom
Except for the Nokia logo and the speakerphone grill, there is nothing on the Nokia C1-00 back. Underneath there is the 1020mAh Li-Ion battery (BL-5C) which is quoted at up to the unbelievable 48 days of stand-by or up to 13 hours of talk-time.
Since we spent only a few days reviewing the phone we can’t give you exact real life battery life numbers. We had to charge the C1-00 battery only once – when starting our review.
Nokia C1-00 Nokia C1-00 Nokia C1-00
The Nokia C1-00 battery cover • a look underneath it – 1020mAh battery and two SIM card slots
Nice build quality is great to have in an entry level handset. The C1-00 delivers on ergonomics too – typing is excellent and navigation is a breeze. Two SIM card slots and a standard 3.5mm audio jack along with a built-in FM radio – not bad at all for the price you pay.
Nokia C1-00 Nokia C1-00
The Nokia C1-00 held in hand

Series 30 user interface

The C1-00 runs Nokia’s Series 30 UI. The only thing to suggest that you’re actually holding a dual SIM capable phone is the tiny SIM1 (or SIM2) label in the center of the homescreen and the indicator in the upper left corner telling you which is the currently active SIM card.
The main menu has two different view modes: a grid of icons or a list of items. As usual, the color background of the entire menu, as well as the wallpaper on the display, can be easily modified by changing the active theme.The menu responds nicely (with occasional lags).
Nokia C1-00 Nokia C1-00 Nokia C1-00 Nokia C1-00
The main menu
There are six predefined ringing profiles on the Nokia C1-00 and on top of them you get an additional user-customizable one. These should be enough to suit practically any situation you could possible face.
While browsing the menu we encountered quite a lot preloaded applications – Converter, Spreadsheet (turned out to be what we used to know as the Expense manager), countdown timer, stopwatch, and even a melody composer. Geez, we thought those were a thing of the past already. Actually, there’s no other way to add custom ringtones, so that’s something.
Also on board there are three games – Bounce, Sudoku, and Forbidden Treasures. And as we mentioned before, the C1-00 also comes with an FM radio (the enclosed headset serves as an antenna since the phone lacks a built-in one).
Interestingly, the Nokia C1-00 has no web browser.
The S30 UI turned out to be user-friendly and responsive enough. If this isn’t your first Nokia device, you shouldn’t have any difficulties getting used to the user interface. There are no goodies such as multi-tasking or active standby but those aren’t to expect on a device priced at 30 euro.

Dual SIM phonebook and telephony

The phonebook of the Nokia C1-00 stores up to 500 contacts – as far as most people are concerned, this is as good as unlimited storage. The phonebook is typical S30 and holds no surprises.
As far as the dual SIM functionality is concerned, contacts on both SIM cards are displayed at the same time, however, you can only add, edit or delete contacts from the currently active SIM card. On the other hand, you can send a message or call any of the contacts no matter if its card is currently active or not.
Nokia C1-00 Nokia C1-00 Nokia C1-00 Nokia C1-00
The phonebook can be searched by gradual typing
Each contact can be assigned only one number. There are no extra fields. The way contacts are displayed is user-configurable – a list of names, numbers or names and numbers. Setting up quick dial shortcuts gives you quick access to the most used contacts.
Another interesting C1-00 feature is the Multi-phonebook. The Nokia C1-00 packs support for up to 5 separate phonebooks allowing multiple users to store there own contacts on a single device. Shared contacts are accessible from all phonebooks, while the others are kept private.
Nokia C1-00 Nokia C1-00
The Multi-phonebook
As for the telephony, the in-call sound is strong and clear. Vibration strength is not very impressive though.
Nokia C1-00
Calling Dee Dee on Nokia C1-00
As we’ve already pointed out, even if the phone is dual SIM capable, only one of the cards can be active at a time. This means the other card will unreachable so in order to receive calls and messages on the inactive number you’ll need to activate it. There’s a quick shortcut for that - just press-and-hold on the asterisk (or star) key.
If you don’t want to miss a call even if the card is currently inactive, you can always divert incoming calls to another phone number (including the active one), however, make sure to contact your service provider for more information on the costs. The handset has an easy Dual SIM menu, which makes forwarding calls between both SIM cards not only easy, but also automatic – should you choose to.
Nokia C1-00 Nokia C1-00 Nokia C1-00 Nokia C1-00
The two SIM settings
Since there was no way to transfer our tones used for the traditional loudspeaker test, we weren’t able to run it. However, the Nokia C1-00 sounds quite loud and missed calls are only likely in noisier environments.

Final words

The last dual SIM phone we reviewed came with features like a touchscreen, Wi-Fi support and a 5-megapixel camera on board and this little fella, the Nokia C1-00, doesn’t even have a web browser. Or a memory card slot. But it’s cheap. And that seems to be its only advantage over the competition.
The C1-00 is a dual SIM phone, but it's not a Dual standby phone. And that's an important difference. The C1-00 doesn't make use of both SIM cards simultaneously. Instead, only one SIM card is active at a time.
We had a really hard time coming up with possible real-life scenarios where the limited Dual SIM functionality would actually be useful. In the end we gave up - perhaps Nokia never meant to use it as a key selling feature. The flashlight and FM radio sound way more practical.
Plus some carriers have been offering dual-number SIM cards for quite some time and since they work the same as Dual SIM telephony on the C1-00, you might as well get one of those and keep your current phone.
We guess the Nokia C1-00 won't be a big hit on the Dual SIM phone market, but despite that, the price of around 30 euro is low enough to make it a bestseller with or without it.